Showing posts with label the Paper Studio. Show all posts

2/29/2016

CardMaker & Faber-Castell Blog Hop

     Welcome to the CardMaker and Faber-Castell blog hop and giveaway! I've had so much fun this weekend creating flowers with the Paper Flowers kit from Faber-Castell.  
     Is this not the most vivid yellow you've ever seen!?! I really love the watercolor gelatos that come in the kit. You just shave some of the pigment off and mix with water or rubbing alcohol and brush it on. I chose to use alcohol so that my flowers would dry faster.
     All the paper layers I used came with the kit including cardstock, vellum and crepe. To protect my desktop from the pigment, I painted my 'lemon' flower layers on top of a large scrap of white cardstock. I never imagined I would use that scrap, but I loved the look of the accidental background. I trimmed it and adhered it with foam tape. I'm so happy about how it turned out.
     The kit also comes with a bottle of 'texture gems' gel to make dew drops and/or designs on the flower petals. Instead, as my rebel side insisted, I made clear drops around my card where I might normally adhere gems or sequins.
     I have a great basket stamp that I thought would be perfect to use with a few flowers from the kit. I painted the centers first with 'metallic melon'. Then, I painted on 'metallic grape' by lightly dragging a stiff brush from the centers out. Once the flowers were dry, I gently scored between each petal of the top layer to get more dimension. I curled the petals and stacked the layers with foam tape that also comes in the kit. I'm telling you, this kit has everything in it you need! But, I digress- I used a Faber-Castell India ink 'light skin #114' marker to add shading to my basket. I finished the card with a heat-embossed sentiment tag and a few white pearls.
------------------------
     Thanks a million for hopping along with us today! I hope we have inspired you to create your own cards or other projects using this Faber-Castell Paper Flowers kit. I would love to see what you create!
     Be sure to stop in and see the amazing creations of my fellow CardMaker blog-team members. Leave a little love for each if you can while you are there. And, make sure you stop at Faber-Castell. They are hosting a giveaway for a lucky hopper.
------------------------
    Your next stop is Faber-Castell.
------------------------
   In case you came here first, or if you get lost, here's a complete list of the blogs that are joining in the fun today.
     CardMaker
      Carisa Zglobicki    
     Dawn Lusk  
     Kim Klinkovsky 
     Linda Beeson
     Lisa Silver
     Pamela Haskin (you are here)
     Faber-Castell

Products Used:
     paper flowers, texture gems gel, gelatos, foam tape- (Faber-Castell 770803T)
     marker- India ink light skin #114 (Faber-Castell 770080)
     cardstock- heavy duty white (the Paper Studio 227041), heavy duty cream (the Paper
                            Studio 667998), purple, yellow, orange (the Paper Studio pack 449769),
                            pre-embossed white (DCWV CM-002-00008)
     stamps- hello sentiment (Hero Arts CL342), blessings sentiment and basket (Our
                       Daily Bread Designs - Basket of Blessings H618)
     pigment- dragonfly black (ColorBox 13165), black dye (Memories BLACK-002-MEMB)
     embossing powder- clear (Ranger Super Fine Detail SFJ06954)
     gems- pearls, white (Michaels 377558), yellow (Prima 530891)


2/14/2016

DCWV Stack-a-holic Challenge - Feb, 2016

 
     Today, I have a card for the Stack-a-holic challenge over at DCWV. I used the Happy Day Stack to create my card. I love the soft colors with the grey in this collection. Grey is a trend I'm seeing everywhere these days. That, and little bits of gold here and there on projects like I have on this card.
     My sentiment is from the Card Crafting Hello collection (2011139) from the Paper Studio. This is one of my very favorite stamps.  I used the Picot Edge Circles (S4-345) dies from Spellbinders to add some dimension to my medallion. I attached the medallion with foam tape. It made so much difference to pop it up rather than adhering it flat against the card.
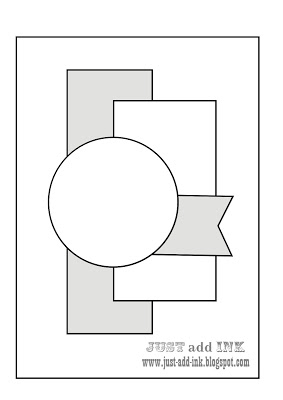
     You still have oodles of time if you want to create something for this challenge. Here's a link to the rules and a copy of the sketch we have to work with this month.
     Thanks so much for stopping in. Hope you have a wonderful day. May the Lord be glorified by the work of my hands, Pamela

10/29/2015

Double Embossing Challenge ODBDSLC260


     Thanks so much for stopping in. Today, I have a card for the Double Embossing (heat and dry) Challenge over at Our Daily Bread Designs.
     My favorite technique has always been heat-embossing. I find it adds that extra touch that gives a more professional finish to my cards. I heat-embossed the sentiment (ODBD - Little Things - #D298) on my card. I used a matching moss green pigment (ColorBox) and clear Super Fine Detail embossing powder (Ranger). I highly recommend using the super fine powders for small lettering like on this stamp. You will get a much better result.
     For the dry embossing, I used a honeycomb embossing folder (the Paper Studio). The  moss green and soft orange cardstock (The Home Spun Stack DCWC) came already embossed with lines. I embossed over that giving a more complex look to my top panel. I added a small strip of the green under the top panels balance to the card.
     I die-cut the circles (Picot Edge Circles-Spellbinders), then  heat-embossed the sentiment on one and added a few green gems.
     There are still a few days left before the deadline if you want to join in the fun. Here's the link to the rules: http://www.ourdailybreaddesignsblog.blogspot.com/2015/10/odbdslc260-double-embossing-heat-and-dry.html

3/27/2015

Fiskafriends The Power of Community Blog Hop and Giveaway

       Welcome to our blog hop!
     We are celebrating our First Anniversary with a Fiskafriend Blog Hop.  You do not have to be a Fiskafriend to visit and comment on our bloggers' posts. This hop is open to everyone! International visitors included! The theme of the hop is Anything Goes, so be prepared to find a variety of creative projects and ideas. 
     Giveaway prizes?  Of course! Everyone loves a giveaway! We will have an end of the hop giveaway with fabulous prizes. In addition to the end of the hop giveaway, some of our bloggers are offering giveaway prizes of their own on their posts. 
   For the complete blog hop list and to be entered in the Fiskafriends' sponsored giveaways, leave a comment on any of the listed blogs and follow the sponsor giveaway entry directions at: http://fiskafriends.blogspot.com/ 
     I am having my own giveaway too! Instructions to enter my separate giveaway are at the bottom of this post.

     I  have Easter cards to share with you on my hop stop.
     I've been playing around lately with the idea of what impact color and simple patterns can have in card design. I used a fairly bright pink on my first card. The gingham gives it a sort of country look, even with the fancy, white, die-cut overlay.
     I used the exact same design on my second card changing only the color and using a solid instead of a printed, oval layer. The second card is certainly more elegant than the first.
     I had a heck of a time photographing this second card. Something about the flowers is reading wrong through my camera. I'm sharing it here anyway, so you can at least get a better idea of what I'm talking about. The flowers in 'real life' are a much better match with this light peach background.  

     >>>DESIGNER TIP<<< To get my heat-embossed sentiment to match the curve of my oval panel, I curved the clear stamp as I placed it on an acrylic block. Kind of gives an extra life to a lot of my stamps.
 
      I want to show you the inside of my cards as well. I often don't put as much effort on the inside of the card, but I'm changing that. I like bringing a little something from the front to the inside - color and theme in this instance. I wish I had thought to put a piece of the die-cut vine on the inside to peak out from under the sentiment tag. Too late, the cards are already in the mail headed to their recipients.

   For the complete blog hop list and to be entered in the Fiskafriends' sponsored giveaways, leave a comment on any of the listed blogs and follow the sponsor giveaway entry directions at: http://fiskafriends.blogspot.com/ 

     Now, for my own giveaway. I have an e-book copy of my latest children's book, "Max, the Boy Raindrop" in which I created all the illustrations using only paper/cardstock and scrapbooking tools. I will also include a fun border punch from EK Success to send to one of my followers (US residents only). Join my blog and your name will go in the drawing. Let me know in your comment that you joined. If you are already a member of my blog,  tell me so and your name will go in as well. I will draw a name for my personal giveaway on Wednesday, April 1st.  Check back in to see if you are the winner. You'll have two weeks to contact me with mailing info.
 
Stacia #9314 is up next:   http://www.stampzone.blogspot.com


Start here: http://fiskafriends.blogspot.com/ 
  1. Jean Bullock, #8889,  http://ez3dpopups.blogspot.com 
  2. Susan Slomski, #6150,  http://sueinct.blogspot.com 
  3. Cindy deRosier, #4113, http://www.cindyderosier.com
  4. Tifany DeGough, #5942, http://inkblotsbytrd.blogspot.com 
  5. Cheryl Waters, #002, http://blog.artsyfindings.com
  6. Jean Marmo, #7358, http://pagesintime.blogspot.com/
  7. Teresa Godines #6857 http://purplebunnypapercrafts.blogspot.com/
  8. Michelle O'Driscoll #7586 http://scrapbookingsos.blogspot.ca/
  9. Nancy Carroll  #11488  http://nancecarroll.blogspot.com
  10. Maya Oren-Dahan #351  http://mayadahan.blogspot.com
  11. Amy Martin Jones #8546 http://thetigershaven.blogspot.com/
  12. Karen Poirier-Brode (Ladydoc) #2858 http://www.karenscorneroftheweb.blogspot.com
  13. Tanya Napier #5407  http://mamabirdy-happinessishomemade.blogspot.com/
  14. Pamela Haskin #8040 www.cottagebelow.com  (You are here.)
  15. Stasia Sloma #9314 http://www.stampzone.blogspot.com
  16. Tracy Moloney  #6773 http://tracyscraftyadventures.blogspot.com.au/
  17. Kim Chenez #5612 http://scrapbooknstampingfun.blogspot.com/


       Here's what I used to make my cards:
          cardstock: white, pink, green the Paper Studio
          patterned paper: pink gingham, the Paper Studio
          die-cuts: overlay and oval layer, Spellbinders 5x7 Heirloom Legacy
                            vine, Our Daily Bread Designs Fancy Foliage
          punches: EK Success lattice chain and corner rounder
          stamps: Paper Smooches Easter Blessings
                          Our Daily Bread Designs Earth Verses
          flowers: Prima Marketing
          brads: Recollections
          ink: black pigment, ColorBox
          embossing powder: clear, Ranger
May the Lord be glorified by the work of my hands, 
                             Pamela
                

10/31/2014

DCWV October Stack-a-holic Card Challenge

Update:  So exited to find out my card made it to the winner's list at DCWV!
     Thanks so much for popping in. I really love your visits. Today, I have a card for the DCWV Stack-a-holic Challenge which I am getting in at the very last moment. Not like me, but I've been super busy this month.
     I used DCWV's Heirloom Stack to make my card for this month's challenge. I bought this stack just for the sheet of paper you see under my card. I have still not been able to cut it! You now how that goes - right!?! It can't just be me.
    I love using unexpected colors for my Christmas cards. Teal and taupe/tan/dark ivory. Let's go with taupe because it's fun to say teal and taupe!  
     If you have an idea for this challenge, you might still have time to get it in. The deadline is today! Here's a copy of the sketch we had to work with and the address for all the details.
     Thanks again for stopping in. I wish you a fun and meaningful holiday season. http://dcwvinc.blogspot.com/2014/10/october-stack-holic-challenge.html


I also used La Petites stickers (the Paper Studio) and sentiment stamps from Hero Arts #CL469.

8/15/2014

DCWV August Stack-a-holic Challenge

UPDATE: Thanks to DCWV for featuring my card on their blog!

    So nice of you to stop by my blog today. Love your visits and comments. I had lots of fun making this card for the monthly challenge over at DCWV.
     I used DCWV's Chickadee Mesange Pajaro Stack to make my card. Love the colors and designs in the stack. To make my pennants pop, I shadowed each one with a different color to create a 3D-look.
     I usually make all my own embellishments, but I had these great stickers I won from Pink Paislee's Hey Kid collection. How could I not use them here? The sentiment is also a sticker from the Paper Studio.
     There is still plenty of time if you want to join in all the fun. Below is a copy of the challenge sketch we had to work with, and here's the link to the rules at DCWV: http://dcwvinc.blogspot.com/2014/08/august-stack-holic-challenge.html
 

7/21/2014

DCWV July Stack-a-holic Card Challenge

UPDATE: So excited to learn my card was among the winners for its challenge. Thanks, DCWV! Love playing along in your challenges.


     Thanks so much for stopping in. Today, I have a card for the July Stack-a-holic Challenge over at DCWV.
     I used DCWV's The Home Spun Cardstock Stack to make my card. I had lots of fun making this card! I got to use several embossing folders and die cuts too. I used the darker teal/turquoise and cream cardstock from the stack. This color combo is my fave and I've saved every little scrap of these sheets. And, see? A good thing I did - look at the little flowers I had to make.
     There is still plenty of time to join in the fun with us. Here's the address for all the details and a copy of the sketch we had to work with.
http://dcwvinc.blogspot.com/2014/07/july-challenge-post-and-giveaway.html


11/12/2013

DCWV November Stack-a-holic Challenge

    UPDATE: I'm so excited to learn my gift tag made the TOP-10 winners list at DCWV! You can check out the other winners here: http://dcwvinc.blogspot.com/2013/12/november-stack-holic-challenge-top-10s.html

 Thanks for popping in today. Hope you are enjoying your winter. Mine has been really busy, but not too busy for another Stack-a-holic challenge from DCWV. Instead of a card challenge this month, we have an ornament challenge, or a gift-tag if we prefer.

     This is my year for gift-tags, I guess. I've had several challenges asking for gift-tags recently. I made this tag as a Christmas tag, but I could easily use it for a number of occasions.
     Here's how I made this one. I cut a light minty-green tag shape (2.5" x 7") from DCWV's Homespun Cardstock Stack - my absolute favorite stack of all time. All other paper for this tag comes from DCWV's Handy-Dandy Stack. I punched a double-loop edge (Martha Stewart) on the bottom end of the tag. I cut a smaller panel from a coordinating patterned paper and adhered it along the side. I ran a small strip of light red/dark rosy patterned paper through my crimper (Fiskars) and matted it with a white panel that was also trimmed with the double loops.
     To make my medallion, I punched a 12" length of a lattice chain edge (EK Success) from the same paper as the side panel. I scored it every 1/2" and fan-folded it into a medallion. It is so pretty and lacey in person. I adhered the snowflake brad (the Paper Studio) with hot-glue in the center.
     I heat-embossed the to-from tag (Fiskars)  in white ink and white embossing powder on the back of a scrap left over from the minty green tag. Then, I punched two holes and laced a length of white, satin ribbon between them. I also added a ribbon to the back so I can tie the tag to a present.
     There is still plenty of time to play along with us. Here's a copy of the sketch we had to work with and a link to all the rules. http://dcwvinc.blogspot.com/2013/11/november-stack-holic-challenge.html

11/03/2013

CAS Christmas Card - Snowstar

     I'm playing along this weekend in Core'dinations ColorCore Cardstock online crop and getting a head start on my Christmas cards.
      Those who know me would tell you that I almost always use non-traditional colors for my Christmas cards - like this purple, blue and white card. The object of this challenge is to create a clean-and-simple card with a sentiment and two or less embellishments. As you see, I only used one which I call a snowstar.
     To get the snowflake brad (the Paper Studio) to shine, I laid it on the back side of a 5 x 7" grape panel from Core'dinations' Nostalgia collection. I marked the arms of the snowflake and then scored from the back along those lines. I did a little sanding and my snowflake, I mean snowstar, shines!
     I heat-embossed the sentiment (Fiskars) with white pigment and white embossing powder. I lightly sanded the edges of the tag to make it stand out against the same color background. To finish, I adhered the panel to a white card base.
     Thanks so much for stopping in today. There is still lots of time left if you want to play along with us. See the Master Challenge List here: http://www.coredinations.com/index.php/2013/10/31/master-challenge-list/


5/22/2013

CAS-ual Fridays Stamping on Designer Paper Challenge (CFC101)

   
      I have one more card to share today. I created it for this week's CAS-ual Fridays Challenge, and what a fun challenge it is - stamping on designer paper!  I really had to think about this card in a different way. I almost always stamp on plain colored paper/cardstock. As I went through my stamps, I had to imagine each one on the printed paper I picked out from DCWV Heirloom stack. The background is a sheet from the Paper Studio's Rue de Fleur collection. I inked the edges with distressing ink to give it more the feel of the old postcard stamp.
     I stamped the postcard image in black ink using Tim Holtz' Travel Collage collection. Then, I picked a sentiment from two different TPC Studio collections (Card Crafting Hello and Girlfriends). This was a fun card to make and I think you could send it to both male and female friends.
     Thanks so much for popping today. And if you would like to play along with us, you can check out the details here:  http://cas-ualfridays.blogspot.com/2013/05/cfc101.html

3/18/2013

Tuesday Trigger - Elegant Emerald

         Emerald green is all the rage lately! It is a gorgeous and elegant color, isn't it!?! This week in the Moxie Fab World, we are playing with emerald green for the Tuesday Trigger challenge.
 
 
     I found this wonderful emerald green butterfly in the Paper Studio's Rue de Fleur collection. It's perfect for this challenge, don't you think. The subtle sheet-music in the background is so fitting for the sentiment from Fiskars.
     Take a look at this inspiration photo from Cath and see if it doesn't inspire you to create. There's still time to play so jump right in and get your fingers inky. Check out all the details here:   http://www.moxiefabworld.com/2013/03/tuesday-trigger-elegant-emerald.html
This Week's Tuesday Trigger


11/12/2012

CAS-ual Fridays So Torn Challenge CFC78

     Thanks so much for stopping in today! I hope your day is as sunny and bright as mine.
     CAS-ual Fridays challenged us this week to make a project with a torn element. Here's my take on the challenge.
     I've been making Christmas cards this week so I took the challenge in that direction. First I made a 4.25 x 5.5 card out of black cardstock. Then, I cut a piece of dark red cardstock 4 x 5.25 and dry embossed it with A2 Quatrefoil embossing folder from the Paper Studio. I tore the bottom edge and added black ribbon and sparkly buckle also from the Paper Studio Spare Parts. The sentiment is from Fiskars All Year Cheer Collection.
     I think Mom will get this card. She loves anything shiny and red!
     Thanks so much for stopping by. If you have an idea for a torn-edge project, you still have time to get it ready. You can find all the details here: http://cas-ualfridays.blogspot.com/2012/11/cfc78.html.

10/29/2012

CAS-ual Fridays Kraft-On Challenge CFC76

     Good morning! Thanks for stopping in. CAS-ual Fridays challenged us this week to make a card with Kraft paper or cardstock. Here's my take on the challenge.
 
 
       I started by making a card base with Kraft cardstock. The 'white and kraft script' background is from Prima's Madeline collection. I cut two lengths of border from the Kraft cardstock and backed them up to each other. Then, I added three fall-colored leaves and attached the 'hope' button to create the focal point.
     Do you have a project in mind using Kraft cardstock? You still have plenty of time to make it and enter it in this week's challenge at CAS-ual Fridays. You can get all the info about joining in the fun here: http://cas-ualfridays.blogspot.com/2012/10/cfc76.html. I will look forward to seeing your work in their gallery.
    Thanks so much for stopping by. I always love your visits and comments!

3/31/2012

5 Cards for $5 Challenge

I made these five different cards for the
5 for $5 Challenge in the Moxie Fab World.


     Card making can be expensive, but it does not have  be. I created this five-card ensemble, including rubber stamps and envelopes for less than $5. It really helps that I rarely buy cardstock, patterned paper or pre-cut card bases if I do not have a coupon or if they are not on sale. 
    I started with six pre-cut, white card bases (5" x 6.5") from the Paper Studio. I used the sixth card to stamp my sentiments so that my cards and tags would match perfectly. (I'm a big time perfectionist. I hate that part about myself sometimes. But, I do end up with very neat and matching projects. lol) I cut one sheet of patterned paper into various shapes and mounted them on a sheet of solid-pink paper. I ran out of that pink so had to use a third sheet of patterned paper to mount my sentiments.
     My fingers were itching to do more to the cards, but the challenge was not to spend over $5. I think I will make more of these sets to give as gifts. Can't you just see them tied up in a pretty pink ribbon!?!
     Here's my shopping list:

                $0.60 --- 6 precut card bases - the Paper Studio
                  0.30 --- 3 sheets patterned paper - the Paper Studio
                  3.00 --- 3 rubber stamp sets - Studio G
                  0.44 --- ribbon - Spool O' Ribbon
    Total    $4.34
 
    Think you can make 5 for $5. You can join in on the fun here:


3/23/2012

Be Still My Blooming Heart

*Welcome to the Fiskateers Spring Blog Hop.*
     You should have come here from  Groovy Deb #2644

     If you are hopping into the middle of our blog hop and you are a Fiskateer, you can start here www.fiskateers.com.
      If you are thinking a “Fiskawhat?”, you should know that Fiskateers (www.fiskateers.com) is an online community of craftiness (paper crafts, sewing, gardening, etc.) all based around our love and appreciation of Fiskars (think orange-handled scissors to start). There is a blog, gallery, and message board led by four lovely Lead Fiskateers who along with the other Fiskateers are fabulous at getting creativity flowing via chats, challenges, on-line crops, and interviews with other crafty celebrities. If you would like to join you can do so here http://www.fiskateers.com/join/. Then, join in the fun at the beginning, www.kellystarsallthingscrafty.blogspot.com for a complete list of blog hop stops.
     We’ll be hopping all weekend , March 24th and 25th to welcome spring! The blog hop officially ends on Sunday March 25th at 11pm CST.

     Like me, some of the Fiskateers are offering sur-prizes…check their directions carefully to participate.

***** Blooming Hearts *****


     I love using my tools in unexpected ways! I created these coral-colored flowers using my Fiskars medium and large That's Amore heart punches. I'll list all my supplies below. I began by making the base of this card out of a medium-lavender cardstock. Then, I added two panels, one of country-blue and the other of light-lavender.

    To make the flower, you will have to double-punch each petal using the heart punches. First, with textured, coral cardstock punch a heart using the medium punch like this:

     Set aside the heart for use on the card later. You will be using the negative space for these petals. Now, punch a large heart centering the small negative space in the middle of the large heart like this:


     To make the larger flower, you will need four of these petals. For the smaller flower you will need two petals. You will also need one medium-size green heart to add to each flower when you're done.


     Begin the flower by gluing one of the petals over only half of another petal like this:


     Add as many or as few petals as you want to make whatever size flower works for your project. When you have the petals together, add the green heart at the bottom.


    Next, I cut a stem and made leaves using my diecut machine. I cut a country-blue vase free-hand but the decoration on the vase is from my diecutter. I attached the vase with double-stick mounting tape to give some depth to the card. Then, I stamped a sentiment from Fiskars' All Year Cheer collection on medium lavender with VersaMark watermark ink. I attached it to the card like a little stake that comes with real, delivered flowers. Lastly, I added some of the medium hearts that were set aside earlier to add some balance to the card. This may sound like a lot of steps but it was fairly quick to put together once I had the design in my head.
    
     I have a fun Fiskars sur-prize for a lucky someone who stops by here this weekend. To have your name entered in the drawing, leave a comment here. I hope you will also join my blog as a follower. Leave your Fiskateer # and your blog address and I'll follow you too. You have until Sunday, the 25th at 11:00 p.m. CST to enter the drawing.

     Thanks for hopping by…next stop is Donna #6036

My Supply List
Fiskars That's Amore medium heart squeeze punch
Fiskars That's Amore large heart squeeze punch
Fiskars Simple Stick rubber stamps, All Year Cheer collection
Spellbinders dies, Parisian Accents and Daisy Heads
VersaMark watermark ink pad
Cardstock--
     The Paper Studio, medium lavender, country blue
     DCWV, textured coral, textured green
     ColorBok, textured light lavender

12/17/2011

Inspired by Fashion Challenge

Another fun challenge in the Moxie Fab World. Cath gave us a Fashion Challenge and here is our inspiration photo.


And, my take on it.


This is such a classy jacket that I wanted to have the same feeling in my card.
I used a herringbone scrapbook paper from the Paper Studio and folded it into a 3D flower.
I added the dotted Swiss from the same collection. That beautiful pearl button comes from Prima. Then, I stamped the sentiment with stamps from Fiskars' Latte Love collection.
And as always, I encourage you to make a card too. Here's the link.