Showing posts with label the Paper Studio. Show all posts

12/13/2021

Christmas Card 2021


      Today, I would like to share my Christmas card with you. I know I've not shared here in a long while. I've been busy working on my writing projects. More coming on that soon. I'm having so much fun writing, but I had to take a day off so that I could play with my paper, ink, stamps and dies. A girl can only go so long without making a card. 

     The basket is heat-embossed in gold (Divinity Designs). The ivy and bow are die-cuts (Spellbinders Paper Arts). The sentiment also heat-embossed in black (Fiskars).


     Look at the detail in the bow. Isn't it gorgeous!?! The red layer is a kind of leather-like and is full of texture (the Paper Studio). The bottom layer is bright, metallic gold. They look so pretty together. 

********

Designer Tip:  Don't feel like you must create cards or other paper projects using only stamps and dies from one company. So many stamps and dies work beautifully together. There is one exception to keep in mind. If you are entering a challenge on a website, sometimes you must use only that company's products.

********

     Thanks so much for stopping in. Hope you have a wonderful Christmas surrounded by all those you love most. 

    Pamela 


1/19/2021

Come See the Magic Card

A Magical Card
Could it be magic? Pull the tab and find out.
     Pull the tab and see the magic happen. 
Keep pulling.

Pull it further until the bees are completely colored. Push the tab back down and the color vanishes.
I stamped the bees with stamps from Reverse Confetti. The sentiment tag stamped from Stampendous and I die-cut the frame with a Spellbinders Paper Arts die. THe beautiful cardstock is from the Paper Studio.
Thanks for stopping by today. 
     Enjoy your day and stay safe out there. May the Lord be glorified by the work of my hands,

 Pamela

9/23/2018

Bling It On Challenge

     Thanks for stopping in. Today I have a card for the Bling It On Wednesday Challenge over at Simon Says Stamps. I blinged it up with  gold-foil prints and glitter paper. There are still a few days left before the challenge ends. Pull out your blingiest supplies and enter your own card.

     Materials Used:
     foil cardstock- DCWV Beach House Stack
     glitter cardstock- the Paper Studio
     bow die- Spellbinders
     sentiment die- Spellbinders
    
     Here's a link to all the rules:
https://www.simonsaysstampblog.com/wednesdaychallenge/
  

3/31/2018

Anything Goes, Simon Says Stamps

     Today, I have a card for the Anything Goes challenge over at Simon Says Stamps. They are spotlighting Stampendous products this week. The sentiment I used on my card is a Stampendous stamp that I've used many times.

     As you probably know, according to the laws of aerodynamics, the bee should not be able to fly with its large body and small, thin wings. And yet it does! Bees always remind me that all things are possible with God.

     Want to join in on the challenge? Here's a link to the rules: http://www.simonsaysstampblog.com/wednesdaychallenge/simon-says-anything-goes-48/
   
     Thanks so much for stopping in today. 
     Pamela

Materials used:
   stamps-  Stampendous!, Stampcraft
   cardstock-  Oh My Lemons (the Paper Studio), Grass Green (Gina K)
   ink-  green (Gina K), black (ColorBox)
 

12/03/2017

Bazzill Sketch Challenge

     I was so honored to be asked to provide a sample card for December's sketch challenge on Bazzill's Facebook page.
     I guess it's the rebel in me that makes me pick colors other than red and green for Christmas. I'm seeing lots of blues like I used on this card though. One year I used orange and turquoise. Another year I used black and silver.
     I hope you'll enter your own card in the challenge. Here's a link to Bazzill's page where you can find the rules and a copy of the sketch.   
 

https://www.facebook.com/bazzillbasicspaper/?hc_ref=ART8oRAZ_K9GYESoOa9f9dpcoYj9LenrEv8N7wyYSzCqjcnO6NNtYF9isXYRNvhSMCI


    Products used besides Bazzill cardstock -

     embossing folder - the Paper Studio
     snowflake die cut - ODBD
     snowflake brad -  the Paper Studio
     sentiment stamp -  Sweet 'n Sassy

     Thanks so much for stopping in today. May the Lord be glorified by the work of my hands, Pamela

9/29/2017

STV17MON39 - Inspirational Photo Challenge


    Today, I'm participating - playing, actually - in the weekly challenge over at Stamp TV for the first time. The team provided the photo below to be our inspiration. My eyes went straight to the apples.
     To create my apples and pears, I first die cut the fruit out of white cardstock. Then, I started daubing several colors until I was happy. 
     I created my "accidental background" when I was coloring my fruit on a piece of scrap piece of cardstock. I thought it looked so pretty with the colors all mixed up, so I decided it would be the best background for my card.
     There's still some time if you want to create your own card. Here's a link to all the rules.
http://stamptv.ning.com/forum/topics/stv17mon39-inspiration-photo
                                  -----------------------
  
  <<< DESIGNER TIP OF THE DAY >>>
    
     Don't be afraid of colors. Most objects have several different, sometimes surprising colors. I used four colors on my apples and three on my pears. I tried several different color combos before I was happy.
     Jump in and give it a try! And remember, it's only paper.                               


    May the Lord be glorified by the work of my hands,
 Pamela

<<< Materials Used >>>
cardstock:  grass green (Gina K Designs)
                     white and black (the Paper Studio)
stamps:      Bold & Blooming (Gina K Designs)
dies:            apple and pear (Spellbinders Paper Arts)
inks:            Black Onyx, Grass Green (Gina K Designs)
                     Citrus Splash, Orchid, Cranberry,
                     Fresh Green, Canary (ColorBox)

9/20/2017

Ironing Board Pops

    Today, I have a layout to share with you. And, a little bit of my heart.
 
         That's my mom there in the picture taken back in 1968. I now have the ironing board in the picture. It has a warp on the surface. It makes a loud pop every time I press with more than the slightest pressure. Ah, but it makes me happy! It brings back such sweet memories from when I was a little girl playing at her feet while she ironed.
     I wrote about "our" ironing board in a story for Angels on Earth magazine. I worked and worked to get a clear enough picture so that you could read the story here, but I was not successful. If you would like to read the story, you can read it free online here.    https://www.guideposts.org/better-living/positive-living/emotional-and-mental-health/memories-are-a-pressing-matter
 
                                                   *************************
      Materials List
Patterned papers-  the Paper Studio - Entirely Textures
Cardstock - gold, Die Cuts With a View, Beach House
Dies-   Spellbinders
Gems-   Die Cuts With a View, Jeweled Sheet

1/21/2017

Color Challenge ODBDSLC282


     Update:  Excited to learn that my card won it's challenge! Thanks so much to Our Daily Bread Designs.


     Thanks for stopping in. Today, I have a card for the monthly challenge at Our Daily Bread Designs. This month ODBD gave us a color scheme to work with.
     I decided this would be a great time to start on my Easter cards. I heat-embossed the eggs in a very light purple. Then, I die cut and adhered some with foam tape to give some dimension and interest. I also heat-embossed and die cut the basket. I attached foam tape in the middle of the basket and adhered the center of the handle and the bottom of the basket directly to the front panel with blue gel glue.

     There is still plenty of time to play along with us. Here's a link to the rules.

http://ourdailybreaddesignsblog.blogspot.com/2017/01/odbdslc282-color-challenge-reminder.html

     May the Lord be glorified by the work of my hands, Pamela


 ODBD PRODUCTS USED:
     Basket of Blessings #H618
     Blessed Easter #H622
     Easter Basket #CBD152
     Egg Dies CSBD86
    
OTHER PRODUCTS USED:
     cardstock- Momenta 26643, the Paper Studio 449769
     embossing powders - clear and pastel lilac
     pigments- black and watermark
     foam and double-stick tape

6/16/2016

CardMaker & Clearsnap Blog Hop


     Welcome to the CardMaker and Clearsnap Blog Hop and giveaway!


     I've had so much fun this week playing with the new ColorBox chalk inkpads from Clearsnap! I love working with chalks, especially when I'm in a hurry. No waiting around for the ink to dry before you can work on the next element. They dry instantly once you've stamped your image.
     I love how this card turned out. I know just which friend to send this to. She'll love it! But, I digress.
     I love the look of just a touch of color on the edges of my cards. For the small squares and the edges of this card, I tamped the paper edges against the  chalk inkpad. I adhered the squares with foam tape. Then, I stamped and die-cut the flowers, butterfly and sentiment. I finished it off with a few pearls on the butterfly and adhered him with foam tape.


     This card has a completely different feel about it. To create the front panel, I started with a sheet of watercolor paper. I trimmed it to size, and then I took two of the chalk pads (Cheeky and Splash) and rubbed them lightly across the paper. I wanted them to overlap where they met to create a third color.
     I stamped the flourish with the same color (Cheeky) I used on the background. I created the sentiment and border edges with the background color (Splash). As you can see, you can get lots of shades from the same chalk ink pad. 
--------------------------------------------
 
Thanks for hoping with us today! Your next stop is Chana's blog. 
 
---------------------------------------------
     Make sure you stop in at all the blogs and leave a comment. We love hearing from you!
     Clearsnap is our host for today's blog hop and and very generous giveaway. They are giving $50 worth of ColorBox products to one lucky hopper. Good luck!
 
     If you get lost or find a broken link, you can go back to CardMaker's blog where there is a complete list of  participating hops. 


Materials List:
     chalk inks-   ColorBox by Clearsnap
                            Splash (16018)
                            Chive (15285)
                            Lipstick Red (16071)
                            Cheeky (15316)
     cardstock-   heavy-duty cream(the Paper Studio 667998)
                            heavy-duty white(the Paper Studio 227041)
     watercolor paper-   Canson
     stamps-        flowers & sentiment (Sizzix 657776)
                            flourish (Inkadinkado 97634)
                           sentiment (Fiskars, Forever Friends Quotes)
     adhesive-    double-sided and foam tape (3M)
     tools-            1/4" heart punch (Fiskars)
                           die cutter


4/27/2016

CardMaker and the Greeting Farm Blog Hop

 
    Welcome to the CardMaker and The Greeting Farm blog hop and giveaway! The Greeting Farm is giving away a great prize for one of you hoppers so keep reading.
     I chose to create my cards using the birthday cake stamps from The Greeting Farm. There are lots of possibilities for this collection. There are several size and design cake layers to mix and match.

     Since I needed a birthday card, I decided to start there. I created the trim on the left side by turning a bow meant for the cake top on it's end.
     On a separate sheet of white cardstock, I stamped my chosen layers, cake stand and candles. I fussy-cut the whole cake and adhered it with foam tape.
     Then, I stamped and trimmed the sentiment tag.
     I used a chalk ink pad for the cake and trim, silver pigment for the stand and candles.


     For my second card, I heat-embossed the bow to use as a vase. I added a tiny punched link to the vase to give some dimension. Then, I heat-embossed the flowers. Like the bow-vase, the flowers were meant to be used as decorations on a cake. With a small paint brush, I picked up pigment from an ink pad and drew in the stems.  Finally, I heat-embossed the sentiment and adhered the white panel to the blue card base.

     Be sure and stop by my fellow CardMaker magazine blog team member's blogs and see all the inspiration they have to share with you today. We all love hearing from you and reading your comments.

     Your next stop is at Carisa's.

    Below is a full list of participating blogs just in case you started here or get lost along the way.

     Thanks so much for hopping along with us today! The Greeting Farm is giving away a $50 gift certificate to one lucky hopper!

Hope you have a great day. Good luck on winning the gift certificate, Pamela


Materials used:
    
     cardstock- heavy duty white (the Paper Studio 227041)
                          blue (the Paper Studio pack 449769)
     stamps-      The Greeting Farm
     punch-        double link trim (Martha Stewart 42-40086)
     chalk-          Arctic Deep (ColorBox 12052)
     pigment-    Orchid (ColorBox 15327)
                          Moss Green (ColorBox 15062)
                          Cyan (ColorBox 15019)
                          Citrus Splash (ColorBox 17022)
                           Silver (ColorBox)
     powder-      clear (JoAnn Essentials)
     adhesive-    double-stick and foam (Scotch 3M)


4/21/2016

O-D-B-D Recipe Challenge (Card 2) ODBDSLC273


     Come on in and look around!
     I have a second card for this month's challenge over at Our Daily Bread Designs. I think it's amazing how differently two cards can turn out when you use the same design. Take a look at my post for April 19th, 2016. That's my first card for the challenge. I loved the design I came up with for that card. I needed another card quickly, so I used the same design. This one goes to Mom. She loves sparkles so I had to use a bunch. I can see her now opening the card and rubbing her fingers across the glitter. Then, she'll hold the card close to her face to read since she can't see very well these days. Oh, I'm making me sad ~~~

     Back to business! As a reminder, the point of this challenge was to take the letters O-D-B-D and use that for our design elements. Here's what I used:
          O-  ODBD stamps (details below)
          D-  designer papers
          B-   bling! bright, sparkly, glittery bling
          D-   dies, ODBD
      I heat-embossed the sentiment onto regular cardstock since the crinkle paper does not take stamping very well. Trust me, ink will bleed everywhere on it.

     TIP: I have found out through much trial and error and more error that glue dots are the best adhesive to adhere things to solid glitter sheets.

     There is still plenty of time to play along with us. Check out the rules here:
   
  Hope you have a great day,  Pamela

Materials used:
     cardstock-  heavy duty cream (the Paper Studio 667998)
                           crinkle turquoise (the Paper Studio 210633)
                           solid glitter (the Paper Studio, champagne 616755)
                           solid glitter (the Paper Studio, turquoise 879593)
                           glitter paper ( purple Core'dinations)
                           plain purple (Core'dinations, Brights GX-3000-04)
     stamps-       sentiment (ODBD, Friendship B52)
     dies-             heart (ODBD, Ornate hearts CSBD53)
                           flourish (Spellbinders, Parisian Accents S5-034)
      ink-             pigment (dragonfly black, ColorBox 13165)
      powder-     embossing powder (clear JoAnn Essentials)


4/19/2016

O-D-B-D Recipe Challenge ODBDSLC273


     Thanks so much for stopping in. Today, I have a card for the O-D-B-D Recipe Challenge over at Our Daily Bread Designs' Blog. The point of this challenge is to use the four letters to design the elements of your card. Here's what I used:
          O- ODBD stamp (details below)
          D- designer papers from ODBD
          B- button (cameo)
          D- dies from ODBD
     I love mixing prints. I know all my choices go together today because someone else has already figured that out. All the prints come from the same 6x6 pad.
     I die cut several layers of flowers to add dimension and a little elegance to my card. I heat-embossed the sentiment and used hot glue to adhere the cameo button.
     Here's a link to all the rules if you want to play along with us: http://ourdailybreaddesignsblog.blogspot.com/2016/04/odbdslc273-o-d-b-d-recipe-challenge_19.html

     Hope you are having a great day, Pamela
    
Materials used:
     cardstock-         prints (ODBD Christian Faith Collection)
                                 heavy duty white (the Paper Studio 227041)
     stamps-             sentiment (ODBD Friendship B52)
     dies-                   flowers (ODBD Asters & Leaves CSBD57)
     button-              cameo (Dress It Up, Nostalgic Treasures 597930)
     ink-                    pigment (dragonfly black ColorBox 13165)
     powder-            embossing powder (clear JoAnn Essentials)

4/07/2016

CardMaker & Ranger Industries Blog Hop


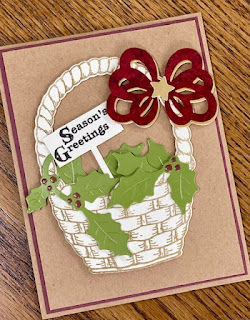
     Welcome to the CardMaker and Ranger Industries Blog Hop!

     This week we, the members of the CardMaker Blog Team, have been playing with the new Tim Holtz water-reactive Distress Crayons. To be quite honest, I was really nervous about today's blog hop. I am more of a stamper than a painter-with-pigment kind of card maker. But, I surprised myself! I had so much fun with these Distress Crayons!
     To get the hang of working with these new crayons, I experimented on some scraps of cardstock first. After just a few tries, I found what worked best for me - work in small areas and smudge with a wet finger. I am really pleased with how my card turned out.
     To begin, I created a 4.25"x5.5" card base with heavy-duty cream cardstock. I heat-embossed a clear background onto another panel of heavy-duty cream cardstock.
     Then, I began coloring. I applied some of the crayon to my cardstock in a small area and with a wet finger smeared it out and over my background. With a wet paper towel, I gently wiped across the embossed areas to allow the embossing to show. I kept coloring little by little with different colors until my panel was all covered. I adhered it to my card with foam tape.
     I stamped over one of my practice-panels and trimmed it to use as the first piece of a freestyle-collage embellishment. I adhered the collage to my card with foam tape.
     I had so much fun learning to use these Distress Crayons! The colors are so vibrant. But, they can also be very soft depending upon how much water you use with them. It's all up to you. With a wet paintbrush, they also make an ombre look very easy to achieve.
     Thanks so much for hopping along with us today! Give these Tim Holtz Distress Crayons a try. I know I will be using my set often!

     Be sure and stop by my fellow Blog Team member's blogs and see all the inspiration they have to share with you today.

     Your next stop is at Carisa's blog.

    Below is a full list of participating blogs just in case you started here or get lost along the way.

   Have a wonderful day, Pamela


     Materials used:
          Distress Crayons-   (Ranger, Tim Holtz pack TDBK47919
                                               seedless preserves TDB49630
                                               chipped sapphire TDB49609
                                               festive berries TDB49586)
                                             
          cardstock-                heavy-duty cream (the Paper Studio 667998)
                                              navy, pink, purple (the Paper Studio 449769)
 
          stamps-                     background (Hero Arts, Line Dots CG316)
                                              butterfly (Unity Stamp Co, Butterfly Endearment UK-777A)
                                              sentiment (Hero Arts, CL342)
                                              dots (Fiskars, All Year Cheer 03-013370)
 
          ink-                            black dye (Memories BLACK-020MEMB)
                                              watermark pigment (VersaMark VM-001)
 
         embossing powder- clear (JoAnn Craft Essentials)
 
          dies-                           circles (Spellbinders GLD-005)
                                              confetti (Our Daily Bread Designs, CSBD15)
 
          brad-                         black (Recollections 356862)
 
          gems-                        purple (Studio G WM0161)
 
          paperclip-                mini (Tim Holtz, ideaology TH92791)

          adhesive-                  foam tape (Scotch 3M)

3/16/2016

CardMaker and American Crafts Blog Hop

     Welcome to the CardMaker and American Crafts Blog Hop! I've had so much fun this week playing with the Amy Tangerine "better together" collection from American Crafts! 
     Just look at all the beautiful colors on this patterned cardstock! So full of spring flowers.
     I started by making a 5x7 white cardstock base. Then, I began adding layers. You know I love lots of layers! My rectangle pieces are 1.25" wide including the navy blue matting. They are, from left to right, 5.75", 4.5" and 5.25" high.
     The triangle accents are from a mistake. I made the rectangles too tall to begin with. I trimmed them and ended up with these triangle shapes that I cut from those leftovers. I really like the look of them! I think I will do this on more cards.
     The die cut flower and acetate sentiment are also part of the "better together" collection. To adhere the "thanks" tag, I adhered the flower with foam tape partially over the tag.

    My second card makes me feel a little naughty. I love mixing prints together even if Mom always told me that was a big no-no.
     I started again with a white card base. I cut tags from different sheets in the collection. As in my first card, the die cut sentiment tag and the acetate flower spray are part of the collection.
     So that the flower spray would show up better on my card, I ran it through my Xyron sticker maker and adhered it to a scrap of white cardstock. Then, I trimmed along the edge of the acetate and attached it with foam tape.
 -----------------------------
     TIP:  A great way to mix prints when you're not sure what goes together is to go with prints from a collection like this one. Someone else has already picked colors and patterns that go with each other.
 -----------------------------
     Thanks a million for hopping along with us today! I hope we have inspired you to create your own cards or other projects using the American Crafts, Amy Tangerine "better together" collection.
     Make sure you stop by my fellow CardMaker Blog Team member's blogs for more great inspiration! Leave them a little love if you have time.
     May the Lord be glorified by the work of my hands, Pamela
 -----------------------------
     In case you came here first, or if you get lost, here is a complete list of the blog writers that are joining in the fun today.

     Your next stop is:  Linda Beeson

     CardMaker
     Lisa Silver
     Linda Beeson
     Dawn Lusk
     Kim Klinkovsky
     American Crafts

Materials used:
     cardstock-     from Amy Tangerine better together collection
                              blogs + coffee #373980
                              cloud + sunshine #373974
                              sweet + sour #373964
                              jack + jill #373972
                              bow + arrow #373982
                              fact + fiction #373979
                              push + pull #373966
                              knot + bow #373977
                              back + forth #373969
                              soap + water #373971
                              cut + paste #373965
                              heavy-duty white (the Paper Studio 227041)
     die cuts-         cardstock and acetate (Amy Tangerine better together collection 373993)
     adhesive-       double-stick tape, foam tape (Scotch 3M)