3/16/2016

CardMaker and American Crafts Blog Hop

     Welcome to the CardMaker and American Crafts Blog Hop! I've had so much fun this week playing with the Amy Tangerine "better together" collection from American Crafts! 
     Just look at all the beautiful colors on this patterned cardstock! So full of spring flowers.
     I started by making a 5x7 white cardstock base. Then, I began adding layers. You know I love lots of layers! My rectangle pieces are 1.25" wide including the navy blue matting. They are, from left to right, 5.75", 4.5" and 5.25" high.
     The triangle accents are from a mistake. I made the rectangles too tall to begin with. I trimmed them and ended up with these triangle shapes that I cut from those leftovers. I really like the look of them! I think I will do this on more cards.
     The die cut flower and acetate sentiment are also part of the "better together" collection. To adhere the "thanks" tag, I adhered the flower with foam tape partially over the tag.

    My second card makes me feel a little naughty. I love mixing prints together even if Mom always told me that was a big no-no.
     I started again with a white card base. I cut tags from different sheets in the collection. As in my first card, the die cut sentiment tag and the acetate flower spray are part of the collection.
     So that the flower spray would show up better on my card, I ran it through my Xyron sticker maker and adhered it to a scrap of white cardstock. Then, I trimmed along the edge of the acetate and attached it with foam tape.
 -----------------------------
     TIP:  A great way to mix prints when you're not sure what goes together is to go with prints from a collection like this one. Someone else has already picked colors and patterns that go with each other.
 -----------------------------
     Thanks a million for hopping along with us today! I hope we have inspired you to create your own cards or other projects using the American Crafts, Amy Tangerine "better together" collection.
     Make sure you stop by my fellow CardMaker Blog Team member's blogs for more great inspiration! Leave them a little love if you have time.
     May the Lord be glorified by the work of my hands, Pamela
 -----------------------------
     In case you came here first, or if you get lost, here is a complete list of the blog writers that are joining in the fun today.

     Your next stop is:  Linda Beeson

     CardMaker
     Lisa Silver
     Linda Beeson
     Dawn Lusk
     Kim Klinkovsky
     American Crafts

Materials used:
     cardstock-     from Amy Tangerine better together collection
                              blogs + coffee #373980
                              cloud + sunshine #373974
                              sweet + sour #373964
                              jack + jill #373972
                              bow + arrow #373982
                              fact + fiction #373979
                              push + pull #373966
                              knot + bow #373977
                              back + forth #373969
                              soap + water #373971
                              cut + paste #373965
                              heavy-duty white (the Paper Studio 227041)
     die cuts-         cardstock and acetate (Amy Tangerine better together collection 373993)
     adhesive-       double-stick tape, foam tape (Scotch 3M)

3/14/2016

10 - Minute Cards


     I'm sharing a "10-Minutes or Less" card on the CardMaker Blog today.


     That was a real challenge for me, but I did it! I actually made two cards in the ten minutes. Check them out on the CardMaker Blog today. Then, give it a go yourself. I surprised myself at what I could do in ten minutes. I think you might surprise yourself too!
     Thanks so much for stopping in.
     May the Lord be glorified by the work of my hands, Pamela

2/29/2016

CardMaker & Faber-Castell Blog Hop

     Welcome to the CardMaker and Faber-Castell blog hop and giveaway! I've had so much fun this weekend creating flowers with the Paper Flowers kit from Faber-Castell.  
     Is this not the most vivid yellow you've ever seen!?! I really love the watercolor gelatos that come in the kit. You just shave some of the pigment off and mix with water or rubbing alcohol and brush it on. I chose to use alcohol so that my flowers would dry faster.
     All the paper layers I used came with the kit including cardstock, vellum and crepe. To protect my desktop from the pigment, I painted my 'lemon' flower layers on top of a large scrap of white cardstock. I never imagined I would use that scrap, but I loved the look of the accidental background. I trimmed it and adhered it with foam tape. I'm so happy about how it turned out.
     The kit also comes with a bottle of 'texture gems' gel to make dew drops and/or designs on the flower petals. Instead, as my rebel side insisted, I made clear drops around my card where I might normally adhere gems or sequins.
     I have a great basket stamp that I thought would be perfect to use with a few flowers from the kit. I painted the centers first with 'metallic melon'. Then, I painted on 'metallic grape' by lightly dragging a stiff brush from the centers out. Once the flowers were dry, I gently scored between each petal of the top layer to get more dimension. I curled the petals and stacked the layers with foam tape that also comes in the kit. I'm telling you, this kit has everything in it you need! But, I digress- I used a Faber-Castell India ink 'light skin #114' marker to add shading to my basket. I finished the card with a heat-embossed sentiment tag and a few white pearls.
------------------------
     Thanks a million for hopping along with us today! I hope we have inspired you to create your own cards or other projects using this Faber-Castell Paper Flowers kit. I would love to see what you create!
     Be sure to stop in and see the amazing creations of my fellow CardMaker blog-team members. Leave a little love for each if you can while you are there. And, make sure you stop at Faber-Castell. They are hosting a giveaway for a lucky hopper.
------------------------
    Your next stop is Faber-Castell.
------------------------
   In case you came here first, or if you get lost, here's a complete list of the blogs that are joining in the fun today.
     CardMaker
      Carisa Zglobicki    
     Dawn Lusk  
     Kim Klinkovsky 
     Linda Beeson
     Lisa Silver
     Pamela Haskin (you are here)
     Faber-Castell

Products Used:
     paper flowers, texture gems gel, gelatos, foam tape- (Faber-Castell 770803T)
     marker- India ink light skin #114 (Faber-Castell 770080)
     cardstock- heavy duty white (the Paper Studio 227041), heavy duty cream (the Paper
                            Studio 667998), purple, yellow, orange (the Paper Studio pack 449769),
                            pre-embossed white (DCWV CM-002-00008)
     stamps- hello sentiment (Hero Arts CL342), blessings sentiment and basket (Our
                       Daily Bread Designs - Basket of Blessings H618)
     pigment- dragonfly black (ColorBox 13165), black dye (Memories BLACK-002-MEMB)
     embossing powder- clear (Ranger Super Fine Detail SFJ06954)
     gems- pearls, white (Michaels 377558), yellow (Prima 530891)


2/28/2016

CardMaker & Faber-Castell Blog Hop Tomorrow

Sneak peek
from one of my
projects.
     Get ready for a really fun CardMaker & Faber-Castell blog hop tomorrow (Monday 2/29/16 - 8 a.m. EST)!
     Start here at CardMaker's blog- http://www.cardmakermagazine.com/blog/
     All links will also be available on my blog- http://www.cottagebelow.com/

2/24/2016

CardMaker Stamp Storage Tip

     Do you have trouble keeping your stamps organized so that you can find them easily? Do you want a quicker cleanup? Check out my feature post on the CardMaker Magazine blog to see how I keep them at my fingertips.

http://www.cardmakermagazine.com/blog/?p=13131

     I would love to see how you keep your stamps organized. I'm always on the lookout for good ideas!
     Thanks for stopping in today, Pamela

2/14/2016

DCWV Stack-a-holic Challenge - Feb, 2016

 
     Today, I have a card for the Stack-a-holic challenge over at DCWV. I used the Happy Day Stack to create my card. I love the soft colors with the grey in this collection. Grey is a trend I'm seeing everywhere these days. That, and little bits of gold here and there on projects like I have on this card.
     My sentiment is from the Card Crafting Hello collection (2011139) from the Paper Studio. This is one of my very favorite stamps.  I used the Picot Edge Circles (S4-345) dies from Spellbinders to add some dimension to my medallion. I attached the medallion with foam tape. It made so much difference to pop it up rather than adhering it flat against the card.
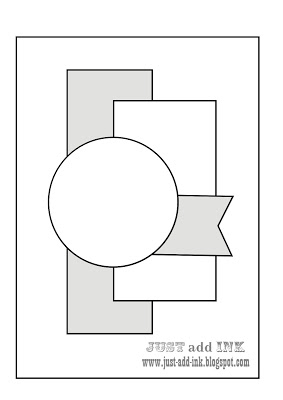
     You still have oodles of time if you want to create something for this challenge. Here's a link to the rules and a copy of the sketch we have to work with this month.
     Thanks so much for stopping in. Hope you have a wonderful day. May the Lord be glorified by the work of my hands, Pamela

2/12/2016

New Life for Your Stamps and Dies

      Sharing a little sneak peak from my card-making-tip post on CardMaker magazine's blog today.
     You won't believe what this was to begin with. Any guesses? You can see the whole thing here: http://www.cardmakermagazine.com/blog/?p=13086
     Thanks for stopping in today,
Pamela
 

2/03/2016

Writing Today on CardMaker Magazine's Blog

     If you've ever wanted to make window-cards, you should check out my tutorial on CardMaker Magazine's blog today!

     I'm excited for you to see the card I created for them. Just click on this link and you will go right to it. 
http://www.cardmakermagazine.com/blog/?p=13033
     Thanks so much for stopping by.
     May the Lord be glorified by the work of my hands, Pamela

1/27/2016

Swirling Red

 
     I created this illustration for a recent SCBWI (Society of Children's Book Writers & Illustrators) contest. I did not win, but I had so much fun creating Red that I had to share her with you.
    SCBWI provided an excerpt from Little Red Riding Hood. We could pick any part of the excerpt to illustrate. I picked this:
     Once upon a time there was a little girl who was so sweet and kind that everyone loved her. Her grandmother, who loved her more than anyone else, gave her a little cape made of red velvet, which suited her so well that she wanted to wear it all the time. Because of that everyone took to calling her Little Red Riding Hood.
     My grannie used to make dresses for me all the time when I was a little girl. The first thing I did in those pretty dresses and their layers of crinoline was twirl around and around. Just like Red Riding Hood!
      I used a light watercolor wash for the background. Everything else is paper! I attached each and every strand of paper-hair and every little stone in the path by hand. I am especially proud of Red's patent leather shoes that I created by brushing a heavy glaze over part of her paper-shoes.
      And, if you look very closely, you will see the wolf.
     Thanks so much for allowing me to have a little of your time today. Hope your day is sunny and bright.
     May the Lord be glorified by the work of my hands, Pamela

1/19/2016

CardMaker and May Arts Blog Hop

     Welcome ribbon lovers and card makers to a Valentine's Day Card Making blog hop with the CardMaker and Ribbon Resource blog teams.
     I'm so excited to share my first posting as a new member of the CardMaker Blog Team! I have two cards to share with you today that celebrate the love between friends.
    
     I love how these two soft-pink ribbons tie the front and back of my card together.

     First, I cut two 4.25 x 5.5 panels. This is a great way to use up large scraps that are not big enough for a card base. I punched two holes in the front and back. I scored just below the holes so that it will be easier to open and display the card later.
     I should say that if you want to add an inside sentiment, now would be the time to do that.
      Cut two 10" lengths of ribbon. Line up front and back panels and insert both ends of the ribbon through the holes from the front of the card.  To have the narrower ribbon on top of the larger one on the finished card, you should insert the smallest ribbon first.
     You now have both ribbons sticking through the back panel. 
     Cross the ribbons in back and feed both ribbons through the opposite holes to the front of the card. 
      Pull the ribbon snug and trim ends as desired.
    
     Next, I trimmed a panel slightly smaller than the front of the card. I heat-embossed the sentiment and added pink 'diamonds' before adhering the panel with foam tape.


****************

     For my second card, I used a beautiful, crocheted ribbon.
     I pleated the ribbon by hand-stitching along the top of the flat ribbon. I adhered the ribbon t0 my card with glue dots. The front panel is a glitter sheet so regular glues and tapes would not hold the ribbon in place. But, the glue dots hold it securely.
     I punched one red and one black large heart. I punched two red and two black medium hearts. I adhered them together as shown, slightly offsetting the red and black to give added dimension.
     I stamped and matted the sentiment, adhering it to the card with glue dots. Then, I hot-glued the gold button and black ribbon in place.
******************

     Be sure to stop in and see the Valentine's Cards at each hop and leave a little love. The Ribbon Resource is giving away some of their gorgeous ribbon to a couple of hoppers.  

     Your next stop is at Terri's!

     Here's a complete line-up of the hops. If you get lost or find a broken link, you can always head over to CardMaker or Ribbon Resource for a complete line-up.


 Supplies used:
    ribbon: Ribbon Resource; cardstock: white heavy weight, black (the Paper Studio); red glitter sheet (DCWV-Holiday Glitzy Glitter Stack); heart punch (Fiskars- That's Amore medium and large); stamps: sentiment (Craft Smart, Hampton Art); gold button: (Dress it Up - Nostalgic Treasures); gems: pink (StudioG); ink: cranberry pigment and pink sky chalk (ColorBox); embossing powder: clear (Stampendous)
                                  

1/18/2016

--- Blog Hop Tuesday ---

     Just popping in to give you a heads up about a Valentine's Day Card blog hop! It begins tomorrow (Jan 19th) at 8 a.m. EST. The CardMaker magazine and the Ribbon Resource blog teams are hosting the hop. There will, of course, be a giveaway. Can't have a proper blog hop without fun prizes! I'll look forward to your visit tomorrow as you hop through my blog!

1/15/2016

Something New, Something Old Challenge ODBDSLC269

     Lots of red glitter and bling for Mom's birthday!
     I don't think it's possible to have too much glitter or too much red for Mom. In fact, she wore a bright, red wedding dress when she got married a few years back. She is just so much fun to be with!
     I created this card for the Something New, Something Old challenge over at Our Daily Bread Designs. My something NEW is their Happy Birthday Die (CSBD77). My something OLD is their Fancy Foliage Die (CSBD33).
     The beautiful, red glitter paper is from DCWV's Holiday Glitzy Glitter Stack.
     Come play with us! Hop on over to ODBD's blog and check out the rules. And, I must say that ODBD's challenge has been changed from weekly to monthly. So very happy about that! Makes it easier for me to play and not always think I missed yet another challenge because I couldn't find the time to create. Here's their link: http://www.ourdailybreaddesignsblog.blogspot.com/2016/01/odbdslc269-something-new-something-old.html
     May the Lord be glorified by the work of my hands, Pamela

1/04/2016

CardMaker Blog Team!

     I'm on the CardMaker Magazine Blog Team!!! I couldn't be more excited to work and share my cards there. We are already working on blog hops and blog posts. You are in for some fun times, new techniques and great organizing tips! I can already feel the rebel in me rising to the top. Who says you must adhere your embellishments and layers perfectly straight!?! Who says turquoise and orange can't go together!?!
    Make sure you follow my personal blog www.cottagebelow.com and the CardMaker blog too http://www.cardmakermagazine.com/blog/ so that you don't miss any of the fun.
    You can meet the other team members here: http://www.cardmakermagazine.com/blog/?p=12846
     Hope you have a wonderful day. Thanks so much for stopping in today, Pamela

1/03/2016

Anything Goes Challenge ODBDSLC268

     Thanks so much for stopping by. Today, I have a card for the challenge at Our Daily Bread Designs.
     I started by making a cream card-base. I used turquoise and purple matting. Don't you just love those colors together!?! I used a turquoise foil sheet to die cut the flower and added a few purple 'diamonds' to finish it off.
     I used the following ODBD stamps and dies:
          No Words sentiment stamp F515
          Fancy Foliage dies CSBD33
          Asters & Leaves dies CSBD57
     Don't forget to check back in tomorrow to see what my new adventure is.
     May the Lord be glorified by the work of my hands, Pamela


1/01/2016

Exciting News for the New Year

     I've been about to burst with my exciting news. I still can't tell you what it is yet. Check back here on Monday, Jan 4th, and I will tell you all about an exciting new adventure for me.
     Wishing you and your family a happy New Year! I hope your year will be filled with lots of fun and laughter, and a chance to start over if you need to.
     Thanks so much for stopping in today. I so enjoy your visits to my blog.
     May the Lord be glorified by the work of my hands, Pamela

12/13/2015

Happy Anniversary to my DH - DCWV Stack-a-holic Challenge, Dec 2015

UPDATE: So excited to find out this card was among the winners! Thanks so much, DCWV,  for selecting my card to feature.

     Today, I have a card for the Stack-a-holic Challenge at DCWV using the Ocean Breeze Stack. I made this card for my husband.
    In just a few days, Jeff and I will celebrate our 37th wedding anniversary! Our time together has been mostly good. But, there are those times he deserves for me to be mad at him! LOL! 
    He is such a good man and my best friend. He really is my anchor. He can calm me when no one else can. He helps me make sense of things in life that would crush my soul if he were not at my side.
    We've had more fun and adventure than most couples. After all these years, we still have 'date night'. Sometimes we have great philosophical discussions that can go on for hours. And, sometimes we are just quiet together. I love those times. And on occasion, at 3:00 a.m., he will take me out to get a milkshake just because I would like to have one.
     He is my biggest supporter when it comes to my writing and cardmaking. I would rather be with him than anyone else on the earth.
     There are also those times when we have hurt each other deeply. But, we always manage to find our way to forgiveness. I try every morning to ask myself what can I do today to make his day better.
    And, my very favorite thing about Jeff? He never minds when I spend money on my cardmaking projects. Who could ask for  anything more!?!
     There is still plenty of time left if you want to join in the challenge to make your own card. Here's a link to the rules and a copy of the sketch we had to work with.
http://www.dcwv.com/blog/post/stack-a-holic-challenge-for-December

     Thanks so much for stopping in today and allowing me to go on about my sweet hubby.
     May the Lord be glorified by the work of my hands, Pamela

12/06/2015

Religious Christmas Challenge ODBDSLC264

     Today, I'm working on Christmas cards. I submitting this card to the challenge at Our Daily Breads Design.

     The challenge is to create a religious Christmas card. I used the ODBD Sparkling Snowflakes (#EC508) and coordinating die to create my "star".
     First, I heat embossed the snowflake onto blue patterned cardstock from DCWV's DIY Ornaments stack. Then, I die cut it. I printed the sentiment on my computer onto white cardstock because I wanted to use this verse (see inside of card below). I often make my own inside verse. I printed it out on regular copy paper and adhered it inside - kind of like fancy card companies do.
     I fussed with this card a long time. It really needed something else. I tried lots of things, but finally I was happy with the scoring around the white panel. Using a scoring board, I drew a score line 1/4" in around the panel.
     Hope you are having a great day. If you want to join in the fun, check out the rules here: http://www.ourdailybreaddesignsblog.blogspot.com/2015/11/odbdslc264-religious-christmas.html
     May the Lord be glorified by the work of my hands, Pamela


12/01/2015

Picture Book Idea Month

     November has been a great month! I participated in Tara Lazar's #PiBoIdMo. The goal of this event was to come up with an idea for a children's picture book every day in November. I did it! That makes me a winner!
     Tara gathered other authors to provide some daily inspiration. I've learned so much and am overflowing with ideas for writing projects. I'm already looking forward to next year's event! 

11/21/2015

DCWV Stack-a-holic Challenge, Nov 2015

UPDATESo excited to see my card among the winners!  Check out all the winners here:  http://www.dcwv.com/blog/post/november-stack-a-holic-challenge-the-results


 Thanks so much for stopping in. Hope your day is as sunny as mine. Today, I have a card for the Stack-a-holic Challenge over at DCWV.
         I used the Ocean Breeze Stack from DCWV to create my card this month. I'm always on the lookout for good "man-paper". This stack has lots of them! Although, as you can see, I made a feminine card. Go figure. I just loved this sentiment card that comes in the stack and wanted to use it on my card.
   There is still plenty of time if you want to join in the fun. Here's the link to the rules and a copy of this month's sketch.
    May the Lord be glorified by the work of my hands, Pamela

10/29/2015

Double Embossing Challenge ODBDSLC260


     Thanks so much for stopping in. Today, I have a card for the Double Embossing (heat and dry) Challenge over at Our Daily Bread Designs.
     My favorite technique has always been heat-embossing. I find it adds that extra touch that gives a more professional finish to my cards. I heat-embossed the sentiment (ODBD - Little Things - #D298) on my card. I used a matching moss green pigment (ColorBox) and clear Super Fine Detail embossing powder (Ranger). I highly recommend using the super fine powders for small lettering like on this stamp. You will get a much better result.
     For the dry embossing, I used a honeycomb embossing folder (the Paper Studio). The  moss green and soft orange cardstock (The Home Spun Stack DCWC) came already embossed with lines. I embossed over that giving a more complex look to my top panel. I added a small strip of the green under the top panels balance to the card.
     I die-cut the circles (Picot Edge Circles-Spellbinders), then  heat-embossed the sentiment on one and added a few green gems.
     There are still a few days left before the deadline if you want to join in the fun. Here's the link to the rules: http://www.ourdailybreaddesignsblog.blogspot.com/2015/10/odbdslc260-double-embossing-heat-and-dry.html

10/28/2015

DCWV Stack-a-holic Card Challenge, Oct 2015

UPDATE: So excited to have my card among the list of winners! Thanks so much DCWV!
 
    Thanks so much for stopping in today. Hope your day is off to a good start. Mine is sunny and bright after 10.2" rain in two days. So thankful for the rain.
     Today, I have a card for the DCWV Stack-a-holic Challenge. I used the Happy Day Stack for my card. It's a new stack and I love every sheet of it.
     Was not sure I would be able to play this month. I spent the last several weeks with Mom who is in a nursing home. She is really struggling, so to those friends of mine who pray, will you lift her up to the Lord today? I can feel your prayers already. Love you all so much. I digress . . .
     There are still a couple of days to join in on all the fun. Here's the link to the rules and a copy of the sketch we had to work with.
     May the Lord be glorified by the work of my hands,
Pamela


10/26/2015

Published in CardMaker Magazine, Winter 2015 Issue


     I am so honored that CardMaker Magazine chose to publish one of my cards in the Winter 2015 issue.
      If you would like to make my card, you can visit www.CardMakerMagazine.com/ to download the Winter 2015 issue today or pick up a print edition of CardMaker magazine which will be on your local newsstand.

10/25/2015

Picture Book Idea Month

     I've been out of town for a few weeks visiting Mom. I'm back just in time to be a part of PiBoIdMo - Picture Book Idea Month. Our challenge, hosted by picture-book author, Tara Lazar, is to come up with a new picture-book idea every day in November. Not only that, but picture-book authors, agents and others from the industry will have things to share with us each day. I'm excited to participate this year. If you have ever thought about writing for young children, you might want to check out this event. Here's the link: http://taralazar.com/2015/10/25/piboidmo-2015-registration-is-open/#comment-119039


9/24/2015

Magazine Monday #118

     It's kind of like getting free paper!!! Some really lovely designs are inside the security envelopes that our bills and other mailings come in.
     I save them all. Just look at what you can create! They also make beautiful flowers. I used six different envelopes for this card that I'm submitting to the Magazine Monday #118 challenge at PaperCrafter's Corner. Check out the inspiration cover and link to the rules below.
     I was inspired by the orange / coral colors against a dark background in this week's cover and the way things are mixed all around each other like a vine growing through it all.
     I used dies from Our Daily Bread Designs (Fancy Foliage) and circle dies from Spellbinders. The sentiment stamp comes from Unity Stamps (. . . bright, happy you). I heat embossed the sentiment tag with black pigment and clear embossing powder.
     Papercrafting Challenge: Magazine Mondays - Week 118 Inspiration Piece (image)
    Thanks again for stopping in. Hope you enjoy your day.
     May the Lord be glorified by the work of my hands, Pamela


9/12/2015

DCWV Stack-a-holic Card Challenge, Sept 2015

     UPDATE: So excited to find my card on the list of winners! Thanks so much DCWV!
      Time for another DCWV Stack-a-holic Card Sketch Challenge already! The time if flying by here.
     I used the The Good Wood Stack to create this Thanksgiving card. There are just so many beautiful wood grains in that stack. I used Fiskars' Quilt Star to punch my embellishments. I cut two of each different one and then stacked them with foam tape.
     There is still lots of time if you want to play along with us. Here's the link to all the rules and a copy of the sketch here too.
 

     Thanks so much for stopping in. I'll be looking forward to seeing your card on the DCWV Facebook page.
    May the Lord be glorified by the work of my hands,
Pamela


9/05/2015

Anything Goes with Scripture - ODBDSLC252

     So nice of you to stop in today. It means a lot to me.
     Today, my card is for the Shining the Light challenge at Our Daily Bread Designs. The challenge was to create a card of any design using scripture. This is one of my favorite scriptures when I am strong enough to give things to the Lord and stop 'helping' Him fix things. LOL
     The sentiment stamp is from ODBD's Phil #C142 collection. I also used my very favorite die of all time - Fancy Foliage, also from ODBD. It's the swirly vine. I did cut it in half to get it just how I wanted it to be in my design.
     I heat embossed the sentiment using violet pigment and clear embossing powder. Next, I die cut the label. I like stamping first before cutting because if I get the sentiment crocked, I can adjust the placement of the die. I adhered it with foam tape to fit over the diamonds. Aren't those gorgeous diamonds!?!
     The other products I used on my card are: Spellbinders dies - Labels Eighteen #S4-310, and Gilded Life trim #GLLD-001. The beautiful purple cardstock is from Recollections Cool Waters #221136, and the adhesive jeweled sheet #EM-035-00043 is from DCWV.
     Thanks again for stopping in. May the Lord be glorified by the work of my hands, Pamela

9/04/2015

Magazine Monday 115 With a Twist

     Thanks so much for stopping in today. Hope you day is off to a great start.
     This week's Magazine Monday 115 challenge at PaperCrafter's Corner is a take on the fun, adult coloring books that are so popular right now.
     There are lots of free coloring pages online which is what I have used for my card. The page was an 8.5x11 sheet of these gorgeous fish to color. As you can see I only colored one fish and let the others serve as a background. I got my page from the list of free pages on PaperCrafter's Corner blog.
     I colored my image with my Spectrum Noir alcohol markers - TB3, IB1, CT1, CT3, PP3, and PP5. I also tried colored pencils and Crayola markers. I liked the Spectrum Noir markers best, but they all looked good.
     And since I really love sparkles, I had to add a big diamond flourish to my card. I trimmed my coloring page and matted it with matching colors of cardstock. My sticker letters came from a big box of scrapbooking supplies I bought at a garage sale for $10!!! Got the diamonds from the box too.
     Here's the link if you want to play along with us. Be sure to check out all the free coloring pages while you are there.
     May the Lord be glorified by the work of my hands, Pamela

8/10/2015

DCWV Stack-a-holic Card Sketch Challenge - August 2015


     Thanks for stopping in. Hope your day is off to a good start.
     Today, I have a card for the Stack-a-holic challenge over at DCWV. I used The Good Wood Stack from DCWV to make my card. Some great masculine papers in the stack. I made this card for my stepdad's birthday coming up soon.
     I made the swags with stamps and dies from Our Daily Bread Designs. The 'cherish you' sentiment is from the I Blank You collection from Paper Smooches.
     There is still plenty of time if you want to send a card to the challenge. Here's a copy of the sketch we had to work with and a link to all the rules.
http://www.dcwv.com/blog/post/stack-a-holic-challenge-for-august